How Do I Use Parameters in a Custom Dashboard?
The parameter option in a custom dashboard lets you build one dashboard for many uses. Typically, you use the parameter value in a filter for each widget in the dashboard (e.g., filtering by parent course).
How to Define a Parameter
To define a parameter:
- From the left menu, click Analytics > Dashboard.
- If you don’t already have a custom dashboard, then make one by clicking the New Dashboard button.
- If you don’t already have a widget in the custom dashboard, then click Add a Widget, else click Edit Dashboard.
- At the top of the dashboard, click the Define Parameters button*.
- In the Define Dashboard Parameters form, enter the key Name, Default value, and select the parameter Type.
- In the widget, click the Edit Widget button (pencil) at the top-right,
- In the Chart Builder, add a filter that changes the chart based on the parameter (in the screenshot, note the last two fields in the filter query — the parameter key name and the Param switch).
- Click the OK button.

*The Define Parameters button only appears while editing the dashboard.
How to Set a Parameter
To change a parameter:
- At the top of the dashboard, click the Set Parameter button.
- In the Set Dashboard Parameters form, click the Search button (magnifying glass) at the right.
- In the Search for Values form, select a picker from the list on the left and click the new value.
- Click the OK button.
The dashboards refreshes, and all widgets that use the parameter will change to filter on the new value.
Unlike when defining a parameter, you can change a parameter while editing the dashboard or not. You can even change the parameter while in a Chart Builder, too.
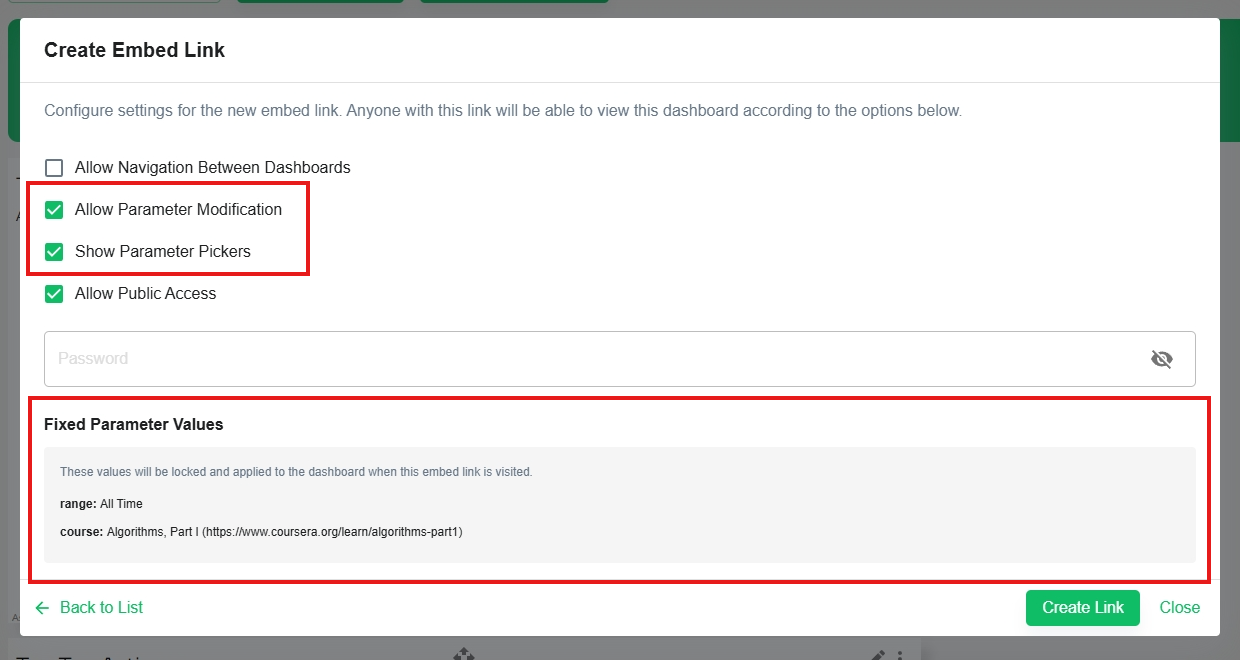
The URL of the dashboard reflects any set parameter (and time range). You can use this when you click Get Link for the dashboard — in the Create Embed Link form, you’ll see the Fixed Parameter Value, as well as options to Allow Parameter Modification and Show Parameter Pickers.
How to Program a Parameter
If you’re using the Advanced Chart Builder, you can use a parameter in VQL like this:
"filter": {
    "context.contextActivities.parent.id": {
        "$param": {
            "path": "course"}}},